
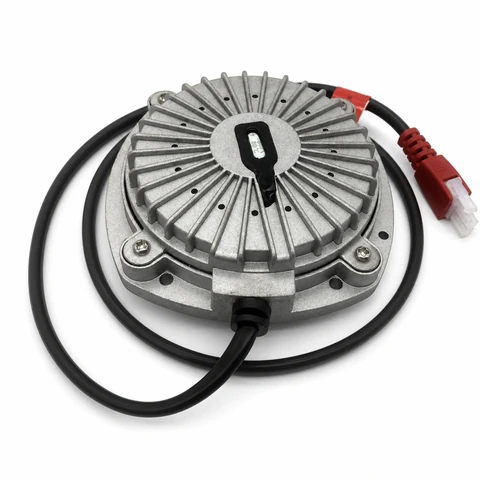

A tactile transducer performs best when it is securely coupled to a rigid part of the structure that can transfer mechanical energy toward the user.
That sounds simple, but mounting is one of the biggest reasons two systems using similar transducers can feel completely different.
A unit mounted firmly to a rigid seat frame can produce clean, immediate tactile feedback. The same unit attached to a thin panel, loose bracket, soft upholstery layer or flexible structure may waste energy, create rattles or feel weaker than expected.
For tactile audio, the mounting system is not just hardware that holds the transducer in place.
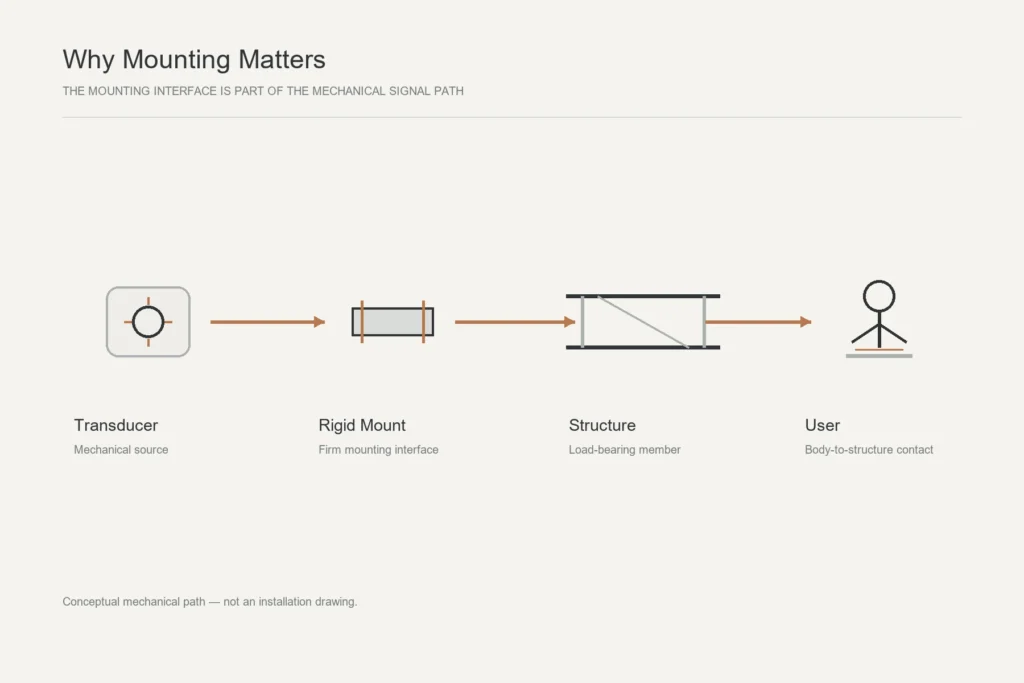
It is part of the mechanical signal path:
Transducer → Mounting Interface → Structure → User
If that path contains looseness, excessive flexibility or a poorly chosen mounting point, part of the motion can be lost before it reaches the body.
This guide explains the main principles behind a good tactile mount and how they apply to recliners, home theater seating, gaming chairs and simulation rigs.
Why Mounting Matters
A tactile transducer converts an electrical signal into mechanical force.
Once that force leaves the transducer, the surrounding structure determines how effectively it reaches the user.
A rigid mounting surface allows the transducer and structure to behave more like one mechanical assembly.
A flexible panel can bend locally instead. Loose hardware can introduce small impacts between components, creating buzzing, knocking or rattling instead of clean tactile feedback.
This is why increasing amplifier power is not always the answer to weak tactile performance.
Before changing the amplifier or transducer, inspect the mechanical installation.
A stronger shaker cannot fully compensate for a poor mounting system.
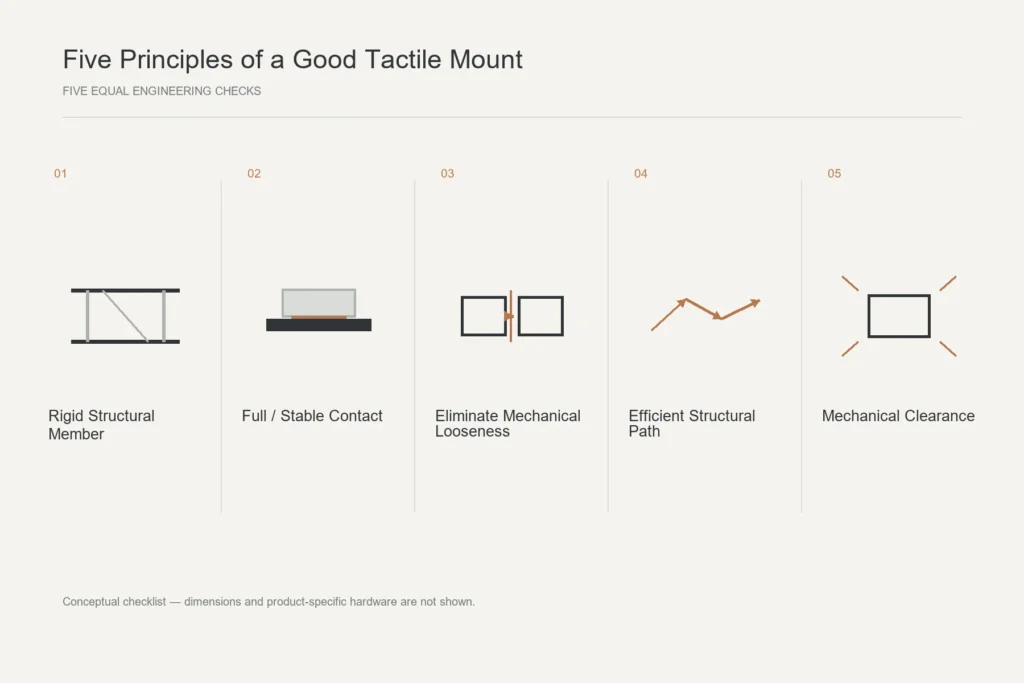
Five Principles of a Good Tactile Mount
1. Mount to a Rigid Structural Member
Start by identifying the part of the product that actually carries load.
In a recliner or sofa, that may be:
- a wooden frame rail,
- a steel crossmember,
- a reinforced seat member,
- a rigid structural mounting board.
In a simulator, it may be:
- an aluminum profile,
- a seat bracket,
- a rigid plate,
- a pedal structure.
In a gaming chair, the usable structure may be concentrated around the seat mechanism or another reinforced metal component.
Avoid using soft or highly flexible materials as the primary mounting surface, including:
- upholstery,
- foam,
- fabric,
- springs,
- thin decorative panels.
The objective is not simply to find somewhere the transducer physically fits.
The objective is to connect it to the structure that can actually carry its mechanical force.
2. Maintain Full, Stable Contact
The transducer should sit firmly against the surface it is intended to drive.
If only part of the mounting face is supported, the transducer may rock, flex the bracket or place excessive stress around individual fasteners.
A stable mounting interface allows the transducer and mounting structure to move together more predictably.
If the original frame does not provide a sufficiently flat or accessible mounting surface, a properly designed mounting plate or bracket can create one.
The important principle is:
Avoid uncontrolled gaps or movement between the transducer and the structure it is supposed to drive.
3. Eliminate Mechanical Looseness
Even a good mounting point can perform badly if the hardware around it is loose.
Potential noise sources include:
- loose bolts,
- loose screws,
- oversized holes,
- flexible brackets,
- nearby trim panels,
- connectors touching the frame,
- wiring striking nearby hardware,
- movable furniture mechanisms.
After installation, operate the tactile system through its intended range while listening for secondary noise.
If a rattle appears, do not immediately assume that the transducer itself is defective.
Inspect the entire mechanical assembly first.
4. Create an Efficient Structural Path
The transducer does not need to be physically touching the user.
It does need an effective mechanical path into the part of the product supporting the user.
For example, a transducer mounted to a rigid seat rail that is directly connected to the seat structure may transfer energy effectively.
A transducer mounted farther away through several flexible joints may deliver a very different result.
This does not mean that the physically closest mounting point is always best.
Structure matters more than distance alone.
A better question is:
How does the force travel from this mounting point into the part of the product supporting the user?
5. Leave Enough Mechanical Clearance
A tactile transducer must coexist with the mechanical system around it.
Allow enough space for:
- the transducer housing,
- fasteners,
- wiring,
- connectors,
- surrounding components,
- product movement,
- future service access.
This is especially important in recliners, motion furniture and adjustable gaming chairs.
A mounting position that looks safe when the seat is stationary may create interference when:
- the backrest reclines,
- the footrest extends,
- the chair tilts,
- the seat rotates.
Always check the full range of mechanical motion before finalizing the mounting position.
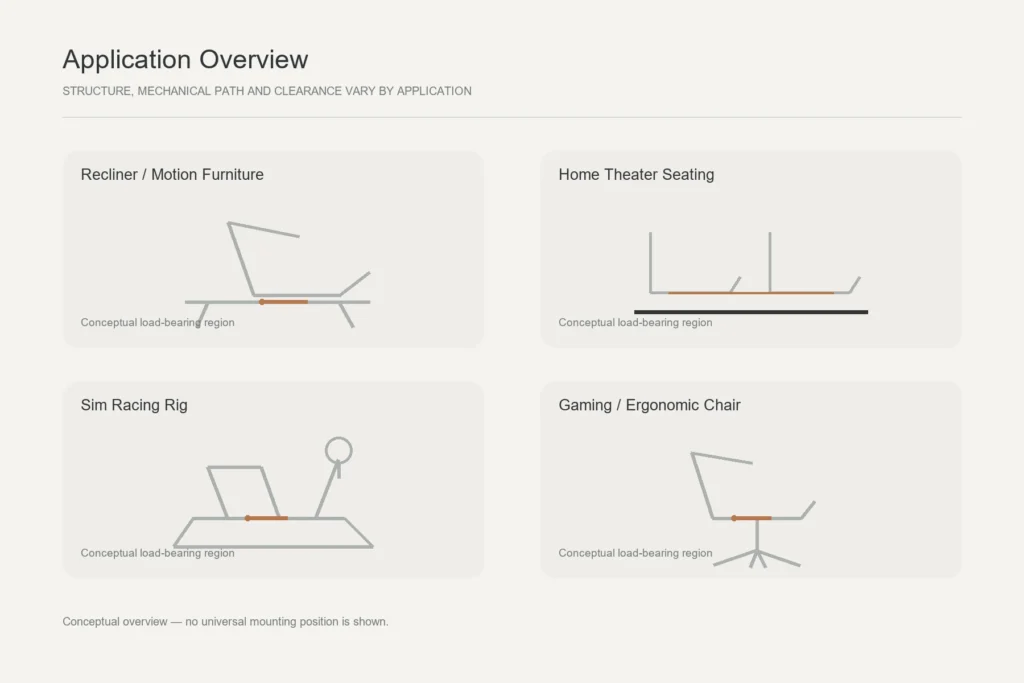
Where Should You Mount a Tactile Transducer?
There is no universal best mounting position.
The correct location depends on the structure of the product.
Recliners and Motion Furniture
Begin by identifying the rigid internal frame beneath or behind the seating area.
Possible mounting locations include:
- hardwood structural rails,
- steel seat members,
- reinforced crossmembers,
- a rigid mounting panel connected to the frame.
Avoid treating upholstery, padding or spring assemblies as primary mounting structures.
If the furniture does not provide a suitable flat mounting zone, a rigid plate can be installed between structural members.
For wood-frame furniture, a properly sized hardwood or plywood panel can provide an effective mounting surface when it is firmly attached to the main frame.
For OEM furniture, it is usually better to define the mounting zone during product development instead of trying to find available space after upholstery and mechanisms are already finalized.
Home Theater Seating
The same principles apply to theater recliners and multi-seat rows.
The transducer should be coupled to a structural part of the chair or seating platform.
For multi-seat systems, also consider how mechanical energy travels between seating positions.
A shared structure may spread vibration across several seats, while mechanically separated seats may provide more localized feedback.
If too much tactile energy is being transferred into the floor, the seating system itself may be isolated from the building structure using suitable feet or isolation elements.
That is different from isolating the transducer from the seat.
We will return to that distinction later in this guide.
Sim Racing Rigs
Rigid simulator chassis are particularly suitable for tactile integration because the structure is accessible and mounting geometry can be controlled.
Possible mounting locations include:
- seat brackets,
- seat plates,
- aluminum profiles,
- pedal structures,
- dedicated tactile brackets.
The preferred position depends partly on what the system is intended to communicate.
A transducer near the seat may emphasize whole-body engine or chassis effects.
A unit located near a pedal structure may be useful when the system is designed to provide more localized feedback.
Regardless of location, the transducer should be mechanically connected to a rigid part of the rig rather than suspended from a flexible accessory panel.
Gaming and Ergonomic Chairs
Gaming and ergonomic chairs create a different packaging challenge.
Available mounting space may be limited by:
- the gas-lift structure,
- seat tilt mechanisms,
- rotating assemblies,
- thin sheet-metal components,
- upholstery,
- moving hardware.
A dedicated bracket can be useful when the chair itself does not provide a suitable flat mounting zone.
The bracket should remain rigid, secure and clear of all moving components.
It must also preserve normal chair adjustment and operation.
For this reason, gaming-chair tactile integration is often as much a mechanical packaging problem as an audio problem.
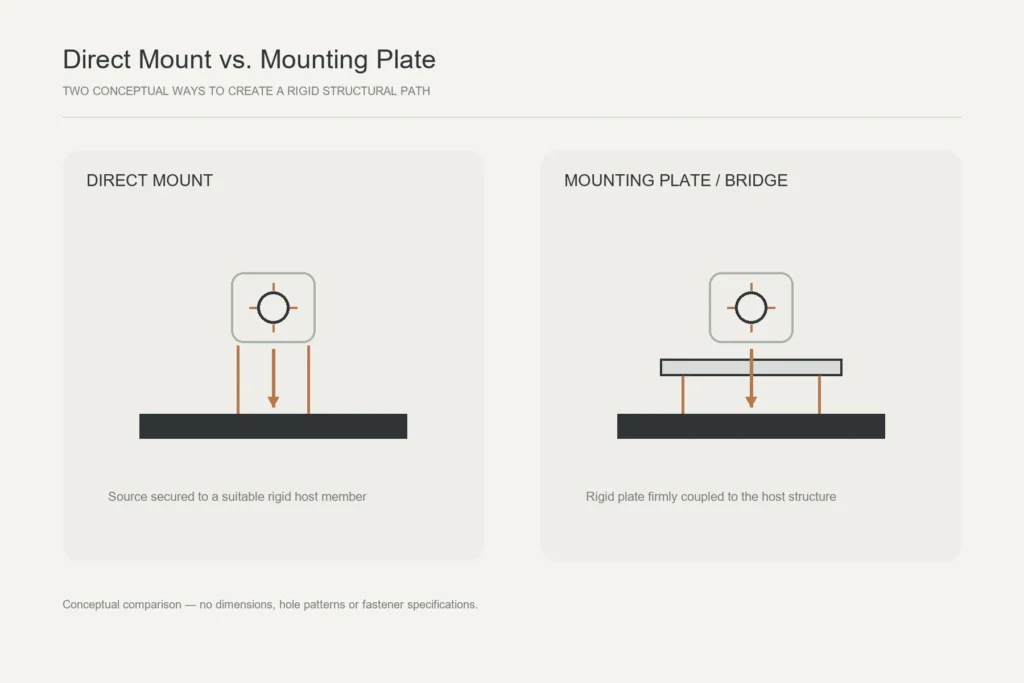
Direct Mount vs. Mounting Plate
There are two common approaches.
Direct Mount
Direct mounting is normally the simplest solution when the host structure already provides:
- a rigid surface,
- sufficient material strength,
- a flat contact area,
- adequate clearance,
- reliable fastening points.
The transducer can then be secured directly to that structural member.
This reduces extra components and can produce a simple, efficient mechanical path.
Mounting Plate or Bridge
A separate mounting plate becomes useful when the original structure does not provide an appropriate mounting surface.
Depending on the application, that plate might be made from:
- steel,
- aluminum,
- hardwood,
- plywood,
- another sufficiently rigid structural material.
The plate must do more than hold the static weight of the transducer.
It must remain sufficiently stiff under repeated dynamic loading.
And most importantly:
The mounting plate itself must be firmly coupled to the host structure.
A rigid transducer mounted to a flexible plate still creates a flexible system.
The plate should therefore be treated as part of the product structure rather than simply as an accessory tray.
How to Prevent Rattles and Mechanical Noise
Many tactile-system rattles originate around the transducer rather than inside it.
After mounting, inspect:
- bolts and screws,
- brackets,
- washers,
- wire harnesses,
- connectors,
- nearby panels,
- moving mechanisms,
- upholstery hardware.
Pay particular attention to cables.
A connector repeatedly striking a metal frame can produce a surprisingly obvious clicking or buzzing sound during strong low-frequency motion.
Managing Small Manufacturing Gaps
Real manufactured components also contain tolerances.
A bracket, frame member or mounting interface may occasionally contain a small clearance that allows two otherwise rigid parts to move against each other.
In these cases, a thin interface material can sometimes help control contact noise and compensate for small tolerance variation.
For example, a thin EPDM layer may be useful in a carefully designed bracket interface.
But the material should not turn the connection into a soft suspension.
The objective is:
Remove unwanted play while preserving firm mechanical coupling.
This is very different from placing a thick soft rubber pad between the tactile transducer and the structure.
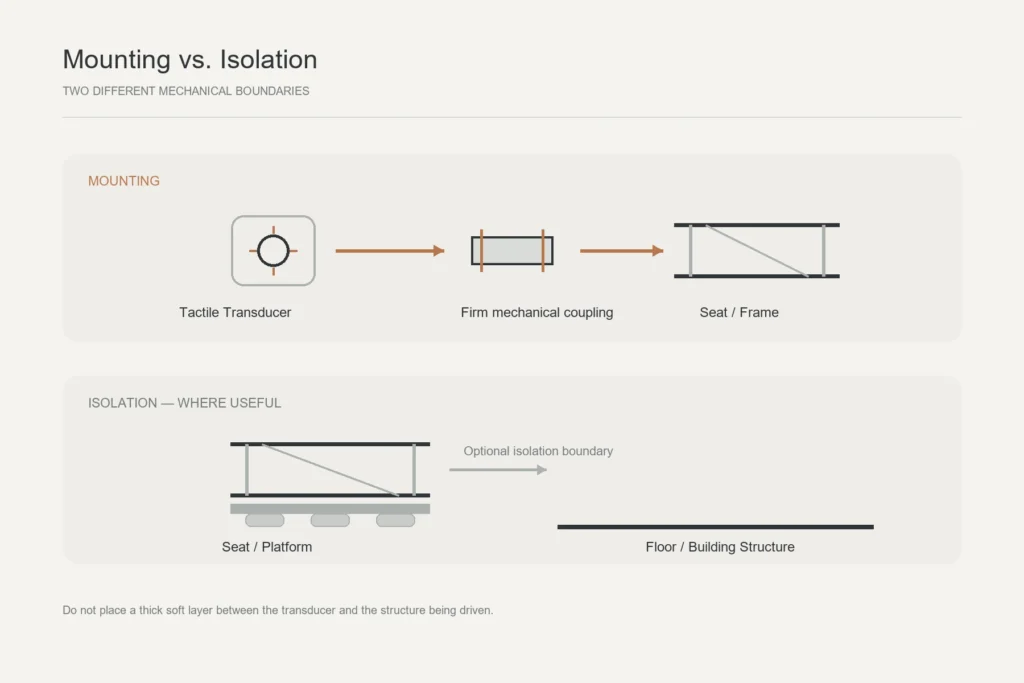
Mounting vs. Isolation: Do Not Confuse Them
This distinction is fundamental.
Mounting
Mounting describes the connection between:
Tactile Transducer → Seat / Frame / Platform
This connection is normally intended to be:
- firm,
- stable,
- mechanically coupled.
Isolation
Isolation usually describes the connection between:
Seat / Platform → Floor / Building Structure
Isolation may be useful when the objective is to reduce tactile energy leaking into the floor or surrounding building.
For example, rubber isolation feet can be placed under a seating system or platform to help retain more vibration in the product being driven.
The simplest rule is:
Mount the transducer rigidly to the product. Isolate the product from the floor when the application requires it.
Do not accidentally isolate the transducer from the structure you are trying to drive.
Installation Checklist
Before finalizing a tactile transducer installation, check:
- Is the mounting surface structural and rigid?
- Is the mounting face stable and sufficiently flat?
- Are the fasteners secure?
- Is the bracket or mounting plate sufficiently stiff?
- Is there enough clearance around the transducer?
- Has the product been tested through its full range of motion?
- Are wires protected from sharp edges and moving components?
- Can cables or connectors strike nearby hardware?
- Are any panels, brackets or fasteners rattling?
- Does the structure provide an effective path toward the user?
If several of these answers are uncertain, improve the mechanical installation before increasing amplifier output.
Common Tactile Transducer Mounting Mistakes
Mounting to a Thin Flexible Panel
The panel bends locally instead of transferring force effectively through the structure.
Mounting Through Thick Soft Material
Foam, thick rubber or upholstery between the transducer and frame can reduce mechanical coupling.
Using a Loose or Flexible Bracket
A bracket that moves independently from the host structure can waste motion and create noise.
Ignoring Clearance
Furniture mechanisms or seat hardware may strike the transducer or wiring during normal operation.
Ignoring the Structural Path
A mounting location can be rigid but still poorly connected to the user’s contact area.
Confusing Isolation With Mounting
Soft isolation materials may be useful between the product and floor.
They should not automatically be placed between the transducer and the structure being driven.
Poor Cable Management
Loose wiring and connectors can become mechanical noise sources when the structure begins to vibrate.
Frequently Asked Questions
Where should I mount a bass shaker on a chair?
Mount it to a rigid structural part of the chair that provides an effective mechanical path toward the user’s seating area.
Avoid foam, upholstery, springs and thin decorative panels.
Can I mount a tactile transducer to plywood?
Yes.
A suitably rigid plywood panel can be used as a mounting plate when the original structure does not provide an appropriate surface.
The panel must itself be firmly attached to the main furniture structure.
Should I put rubber between a bass shaker and the frame?
Not as a general rule.
The connection between the tactile transducer and the host structure is normally intended to remain mechanically firm.
A thin interface material may sometimes be useful for tolerance or noise management, but a thick soft layer can reduce coupling.
Is it better to mount a bass shaker under the seat or behind it?
Neither position is automatically better.
Choose the location based on:
- structural rigidity,
- mechanical path,
- clearance,
- the tactile effect you want to create.
How tight should a tactile transducer be mounted?
It should be secured firmly enough that the transducer cannot move independently from its mounting surface.
Use suitable fasteners and follow the hardware limits of the transducer, bracket and host structure.
Avoid overtightening components beyond their safe mechanical limits.
Why does my bass shaker rattle?
Common causes include:
- loose fasteners,
- flexible panels,
- poor mounting contact,
- cables touching the frame,
- moving furniture hardware,
- nearby resonant components.
Inspect the surrounding mechanical structure before assuming the transducer itself is faulty.
Better Mounting Starts With the Structure
Installing a tactile transducer is not simply a matter of finding enough physical space for the component.
The mounting point, interface, fasteners and host structure all influence what the user ultimately feels.
A good installation creates a controlled mechanical path:
Transducer → Rigid Mount → Structure → User
For a retrofit chair, that may mean identifying the strongest existing frame member.
For a simulator, it may mean designing a dedicated mounting bracket.
For an OEM furniture program, the better solution is often to define the tactile mounting zone as part of the product structure from the beginning.
SoundKeel develops tactile transducers and integration solutions for seating, furniture and simulation applications.