
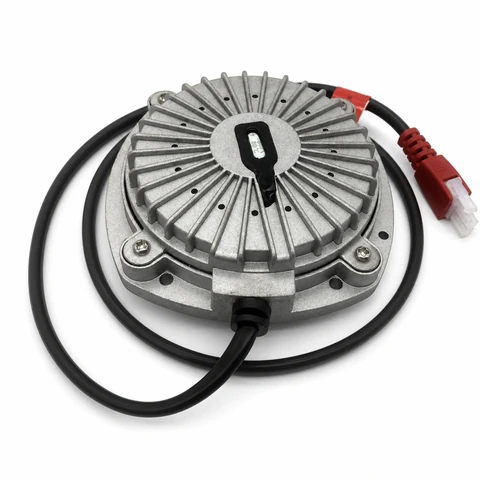
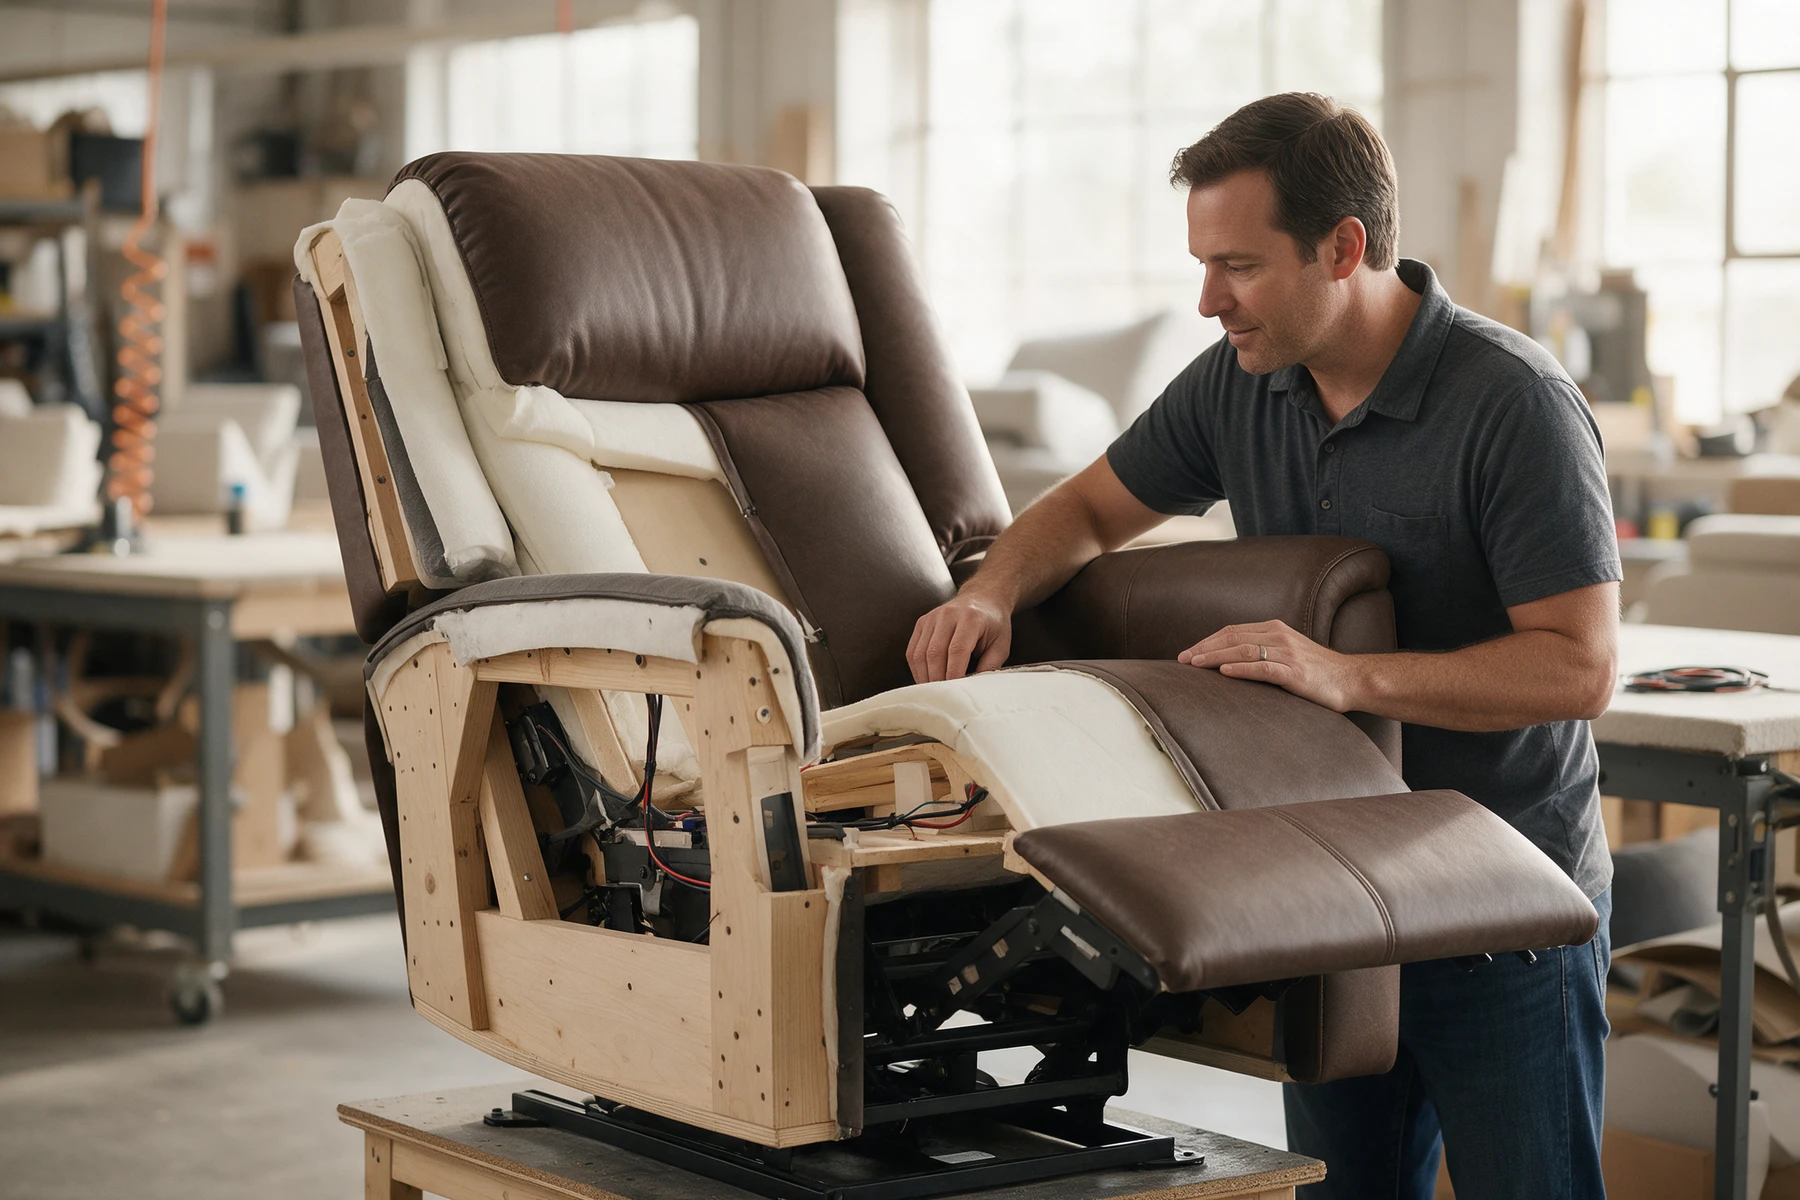
Adding a tactile transducer to a finished chair is relatively simple.
Designing tactile feedback into a furniture product is a different problem.
For a production recliner, sofa or seating platform, the transducer needs to work together with the frame, amplifier, wiring, upholstery, motion mechanism and manufacturing process.
That means tactile integration should not begin with the question:
Where can we fit the shaker?
A better starting point is:
How should mechanical energy travel through this product to the user?
Once that path is understood, the transducer, mounting interface and electronics can be designed around it.
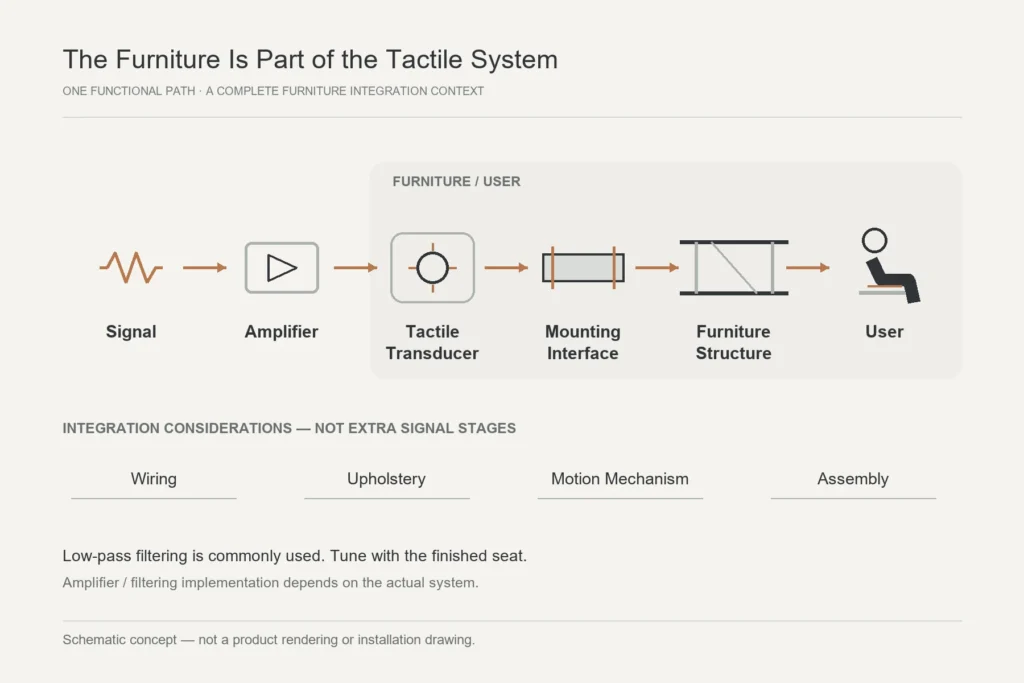
A useful system model is:
Signal → Amplifier → Tactile Transducer → Mounting Interface → Furniture Structure → User
Every stage influences the final experience.
Start With the User Experience
Before choosing hardware, define what the furniture is supposed to do.
Different products may require very different tactile behavior.
A home theater recliner may need controlled low-frequency impact synchronized with movies.
A gaming chair may need more localized and responsive feedback.
A wellness or relaxation product may use lower-intensity vibration patterns for a completely different experience.
An OEM design team should therefore define:
- intended tactile intensity,
- user contact areas,
- content or signal source,
- number of tactile zones,
- expected operating time,
- noise limits,
- control requirements.
These decisions affect almost everything that follows.
Treat the Furniture Frame as Part of the Tactile System
The transducer does not create the final user experience by itself.
Its mechanical force enters the furniture structure.
From there, the frame determines how that energy is distributed.
A rigid crossmember can transfer vibration very differently from:
- a thin decorative panel,
- a flexible spring assembly,
- upholstery,
- a loosely connected bracket,
- a moving recliner linkage.
For this reason, tactile performance should be considered during frame design whenever possible.
The ideal mounting zone is normally connected to a structural member that has an effective path toward the user’s body.
The question is not simply whether the structure is strong enough to hold the transducer.
It also needs to transmit dynamic mechanical force in a controlled way.
Define a Dedicated Mounting Zone
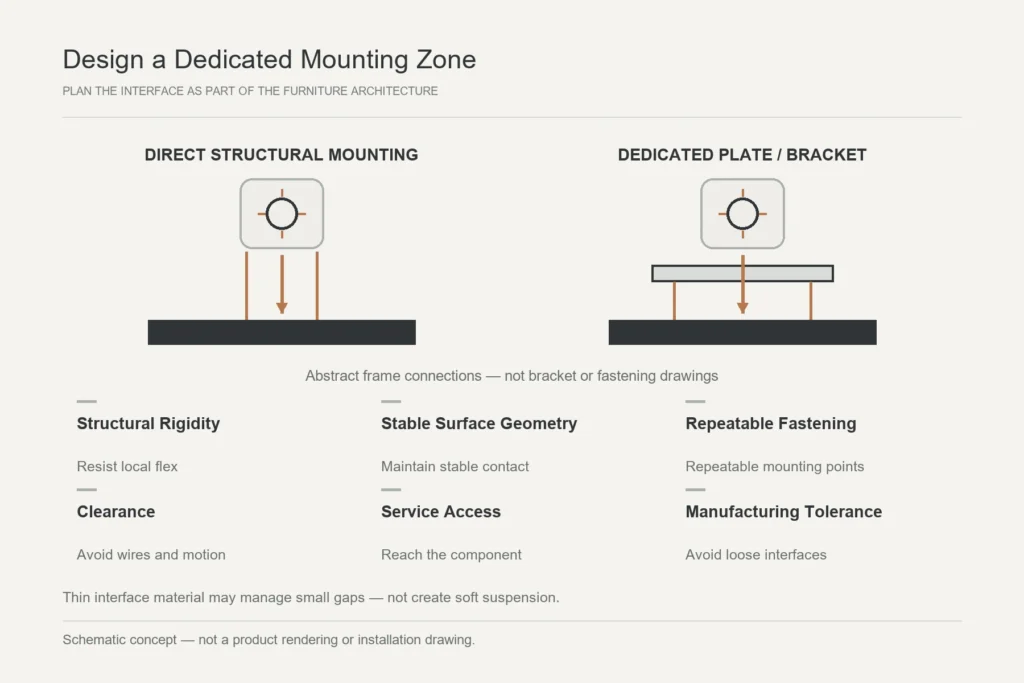
A production furniture design benefits from having a clearly defined tactile mounting zone.
That zone should consider:
Structural rigidity
The mounting structure should resist unnecessary local flex.
Surface geometry
The mounting interface should provide stable contact.
Fastening
The production line needs repeatable mounting points.
Clearance
The transducer must remain clear of upholstery, wires and moving mechanisms.
Service access
If replacement is ever necessary, technicians should be able to reach the component without destroying the furniture.
Manufacturing tolerance
Small dimensional variations between frames should not create loose interfaces or inconsistent mounting.
This is where a dedicated bracket, steel crossmember or mounting plate can be valuable.
Instead of forcing the transducer into whatever space remains after the furniture is finished, the mounting zone becomes an intentional part of the product architecture.
Direct Frame Mounting vs. a Dedicated Mounting Plate
There are two common approaches.
Direct Structural Mounting
If the frame already provides an appropriate rigid surface, the transducer can mount directly to it.
Advantages include:
- fewer parts,
- shorter assembly time,
- compact packaging,
- a direct mechanical path.
This approach works best when the mounting geometry is already compatible with the transducer.
Dedicated Mounting Plate or Bracket
Many furniture structures do not provide a suitable flat surface.
A dedicated mounting plate can bridge between structural members and provide a controlled installation interface.
Depending on the product, it may use:
- steel,
- aluminum,
- hardwood,
- structural plywood,
- another appropriately stiff material.
The key principle is that the plate must become part of the structure.
A stiff transducer mounted to a flexible plate does not create a stiff system.
Plan Around Recliner and Motion Mechanisms
Motion furniture introduces an additional challenge:
The structure changes position.
A mounting location that appears safe while the chair is upright may interfere with:
- the footrest,
- recliner linkage,
- actuator,
- rotating shaft,
- wiring harness,
- upholstery,
- adjacent frame members
when the chair moves.
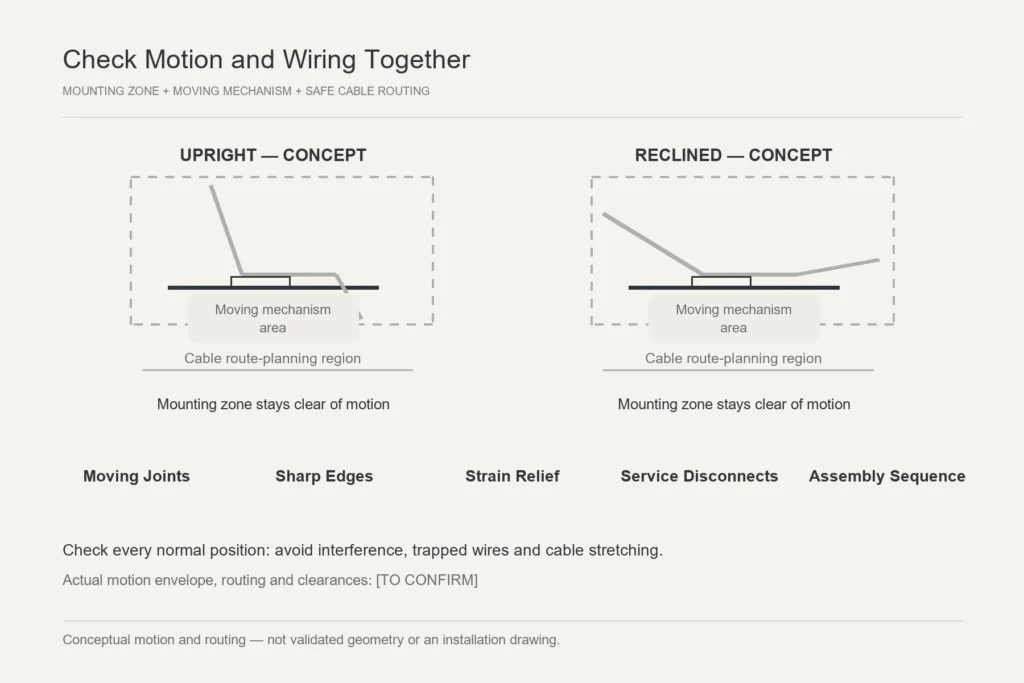
Before freezing the design, the complete mechanical motion envelope should be checked.
That means testing the transducer, bracket, connectors and wire routing through every normal furniture position.
For an OEM product, this should be part of engineering validation rather than left to final assembly.
Design the Wiring at the Same Time
Mechanical integration and electrical integration should not be separated.
The transducer needs a safe wiring route between the mounting zone and amplifier.
Consider:
- cable length,
- connector location,
- strain relief,
- moving joints,
- sharp frame edges,
- service disconnects,
- assembly sequence.
A wire that is safe with the chair upright may become stretched or trapped when a recliner moves.
Likewise, a loose connector touching the furniture frame can become a source of mechanical noise when the tactile system is active.
Wire routing therefore needs to be validated under both:
furniture motion and tactile vibration.
Decide How Many Tactile Zones the Product Needs
More transducers do not automatically mean a better product.
The correct number depends on:
- seat size,
- furniture mass,
- structural layout,
- required localization,
- amplifier architecture,
- cost target.
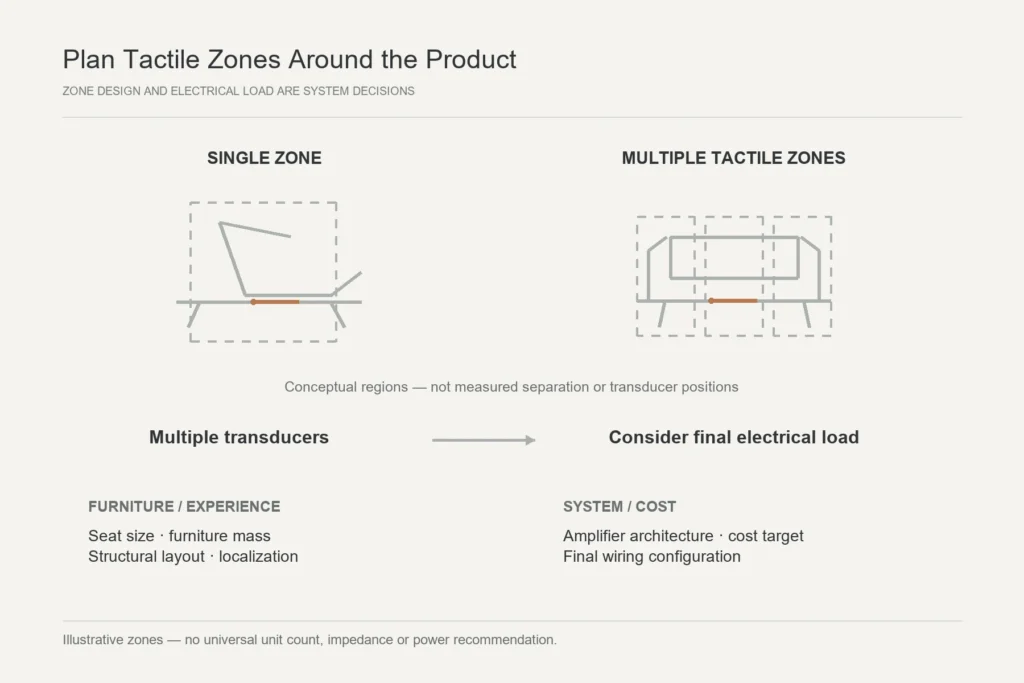
A single transducer may be sufficient for a compact seat.
A wide sofa or multi-seat platform may benefit from multiple units.
For more advanced products, separate tactile zones can be used to create different sensations at different locations.
Once multiple transducers are involved, electrical design also becomes more important because series and parallel configurations change the impedance presented to the amplifier.
The system should be designed around the final electrical load—not simply the number of available amplifier terminals.
Match the Amplifier to the System
A tactile transducer requires an amplifier capable of safely driving the intended load.
Important factors include:
- nominal impedance,
- rated power,
- number of transducers,
- wiring configuration,
- low-frequency capability,
- filtering,
- gain control.
More amplifier power does not automatically create a better tactile experience.
The amplifier and transducer need to operate as a controlled system.
For a production furniture product, it is also useful to consider whether tactile level should have independent adjustment from the audible speaker system.
That gives the user control over how physical the experience feels without forcing the speaker volume to change at the same time.
Use Filtering to Control the Tactile Channel
Tactile feedback is normally most useful in the low-frequency range.
Allowing unnecessary upper-frequency information into the tactile channel may increase:
- audible mechanical noise,
- buzz,
- unnatural vibration,
- distraction.
Low-pass filtering is therefore commonly used in tactile systems.
There is no single crossover frequency that is ideal for every furniture product.
The appropriate setting depends on the transducer, structure and intended experience.
For an OEM platform, filtering should therefore be tuned as part of the finished seat rather than based only on a bench test.
Manage Manufacturing Tolerances Without Softening the Mount
Real furniture frames are not mathematically perfect.
Metal parts, wood structures and brackets all contain manufacturing tolerances.
Small clearances can sometimes create:
- buzz,
- contact noise,
- unstable mounting,
- repeatability problems.
A thin interface material may help manage small gaps when it is used carefully.
For example, a thin EPDM interface can be useful between rigid mechanical components when the objective is to eliminate unwanted play or prevent hard-contact noise.
But that material should not become a thick soft suspension.
The design objective remains:
Control the interface without unnecessarily decoupling the transducer from the structure.
Consider Isolation at the Furniture Level
Mounting the transducer and isolating the furniture are two separate design decisions.
The transducer should normally remain firmly coupled to the furniture structure.
However, the furniture itself may sometimes benefit from isolation from the floor.
Rubber feet or other isolators can reduce mechanical energy leaking into the building structure and keep more tactile response in the seat or platform.
The distinction is simple:
Transducer → Furniture: firm mechanical coupling
Furniture → Floor: isolation where useful
Design for Manufacturing and Service
A prototype only has to work once.
An OEM product needs to work repeatedly.
Before moving toward production, check:
- mounting-hole consistency,
- fastener specification,
- assembly tool access,
- connector orientation,
- wiring length,
- bracket tolerance,
- installation sequence,
- replacement access,
- QC method.
A good tactile design should be understandable to an assembly operator without requiring manual tuning on every unit.
Where possible, use features that reduce installation variability:
- fixed hole patterns,
- locating features,
- defined torque procedures,
- dedicated cable routes,
- keyed connectors.
Repeatability is part of product performance.
Validate the Complete Furniture, Not Just the Transducer
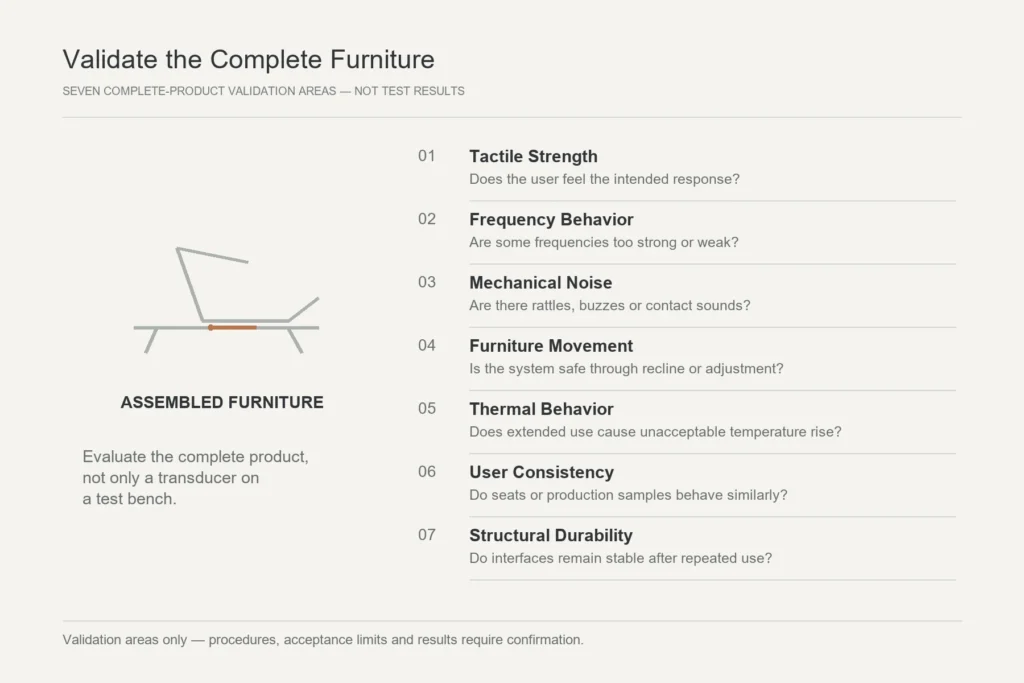
Bench testing the transducer is useful, but the final product should be evaluated as an assembled system.
Validation should include:
Tactile strength
Does the user feel the intended response?
Frequency behavior
Are some frequencies excessively strong or weak?
Mechanical noise
Are there rattles, buzzes or contact sounds?
Furniture movement
Does the system remain safe through recline or adjustment?
Thermal behavior
Does extended operation create unacceptable temperature rise?
User consistency
Do different seats or production samples behave similarly?
Structural durability
Do fasteners or mounting interfaces remain stable after repeated use?
A tactile furniture system is finished only when the complete product works—not when the transducer operates on a test bench.
A Practical OEM Integration Workflow
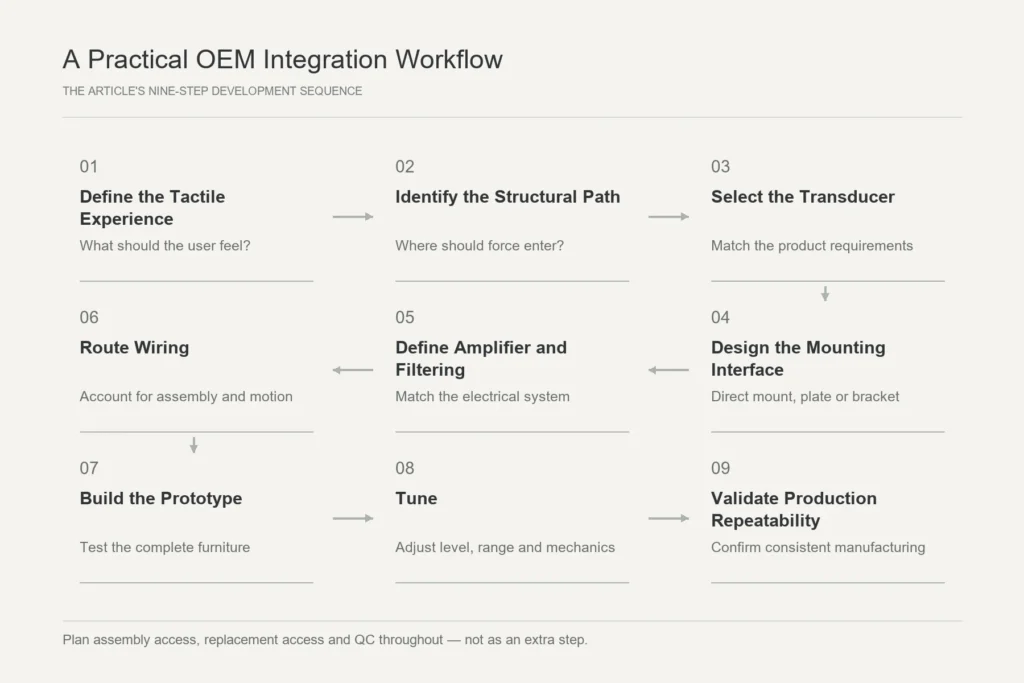
A useful development sequence is:
- Define the tactile experience
What should the user feel? - Identify the structural path
Where should mechanical force enter the product? - Select the transducer
Match size, power, impedance and mounting geometry. - Design the mounting interface
Direct mount, plate or bracket. - Define amplifier and filtering
Match the electrical system to the tactile goal. - Route wiring
Account for assembly and motion. - Build the prototype
Test the complete furniture. - Tune
Adjust tactile level, frequency range and mechanical details. - Validate production repeatability
Confirm that the design can be manufactured consistently.
This approach reduces the chance that tactile feedback becomes an awkward accessory added at the end of product development.
Frequently Asked Questions
Can a tactile transducer be built into a sofa?
Yes. The transducer should be mounted to a rigid structural part of the sofa or to a rigid mounting plate connected securely to the frame.
Where should a tactile transducer be mounted in a recliner?
The ideal location depends on the frame. Look for a rigid structural member with an effective mechanical path to the seating area while maintaining clearance from the recliner mechanism.
How many tactile transducers does a sofa need?
There is no universal number. It depends on furniture size, structure, desired intensity and whether separate tactile zones are required.
Can multiple tactile transducers use one amplifier?
Yes, when the final wiring configuration produces an impedance and power requirement the amplifier can safely support.
Should the transducer be installed before upholstery?
For an OEM furniture product, planning the mounting location, wiring and service access before final upholstery normally makes integration easier and more repeatable.
Can tactile feedback be added to an existing furniture design?
Yes, although retrofit integration may require a mounting plate or bracket if the original frame was not designed with a suitable tactile mounting zone.
Tactile Integration Is a Product-Level Decision
The best tactile furniture systems are not created by simply adding a vibrating component to a finished chair.
They are created by coordinating:
transducer + mounting + structure + electronics + wiring + assembly
as one system.
For a one-off retrofit, that may mean identifying a strong frame member and adding a rigid mounting plate.
For an OEM product, it means planning the tactile architecture early enough that it becomes part of the furniture design.